Introduction
Product 2 PDF lets your visitors download a clean, branded PDF sheet of any product directly from its product page. The PDF is generated on the fly from the product’s own data (name, price, images, descriptions, features, brand) and is fully styled from the back office: header with your logo, footer with date, pagination and QR code, theme colours and fonts, and a choice of page layouts.
Typical use cases:
- B2B catalogs & quotes: let buyers save or print a spec sheet per product.
- Print-friendly product sheets: a tidy A4/Letter document instead of a web page.
- Offline sharing: a self-contained file with a QR code back to the live page.
No external service is used: PDFs are produced locally with the bundled TCPDF library, so nothing leaves your server.
Compatibility & requirements
| PrestaShop | 1.7.8 to 9.x |
|---|---|
| PHP | 7.2+ (follows your PrestaShop’s PHP support) |
| Multistore | Compatible: each shop keeps its own settings |
| PDF engine | TCPDF (bundled, nothing to install) |
| Fonts | TCPDF natives + bundled Roboto, EB Garamond, Great Vibes |
| Server | Standard PrestaShop hosting; write access to the module’s views/img/templates/custom folder for image uploads |
The module ships everything it needs. There is no Composer/npm step for the merchant and no third-party API key.
In a multistore installation, use PrestaShop’s standard store selector at the top of the configuration screen: each shop keeps its own theme, layout and settings, and PDFs are generated per shop.
Installation
From the back office (recommended)
- Go to Modules → Module Manager.
- Click Upload a module and select
pmdproduct2pdf.zip. - PrestaShop installs and enables the module automatically.
- Click Configure to open the settings (or find it later under Module Manager → search “Product 2 PDF” → Configure).
From the command line
php bin/console prestashop:module install pmdproduct2pdfAfter installation
The download button appears on the product page through one of several hooks (see Front office). By default it is shown; if you don’t see it, check the General tab switches and your theme’s hook positions (Design → Positions).
Quick start
Get a first PDF in three steps:
- Open Modules → Module Manager → Product 2 PDF → Configure.
- On the General tab, make sure Display button on product page is enabled and pick a Page layout (start with Image left).
- Open any product page on your shop and click the PDF button.
That’s it: the PDF opens in the browser, ready to save or print. Everything else below is about tailoring how it looks.
General tab
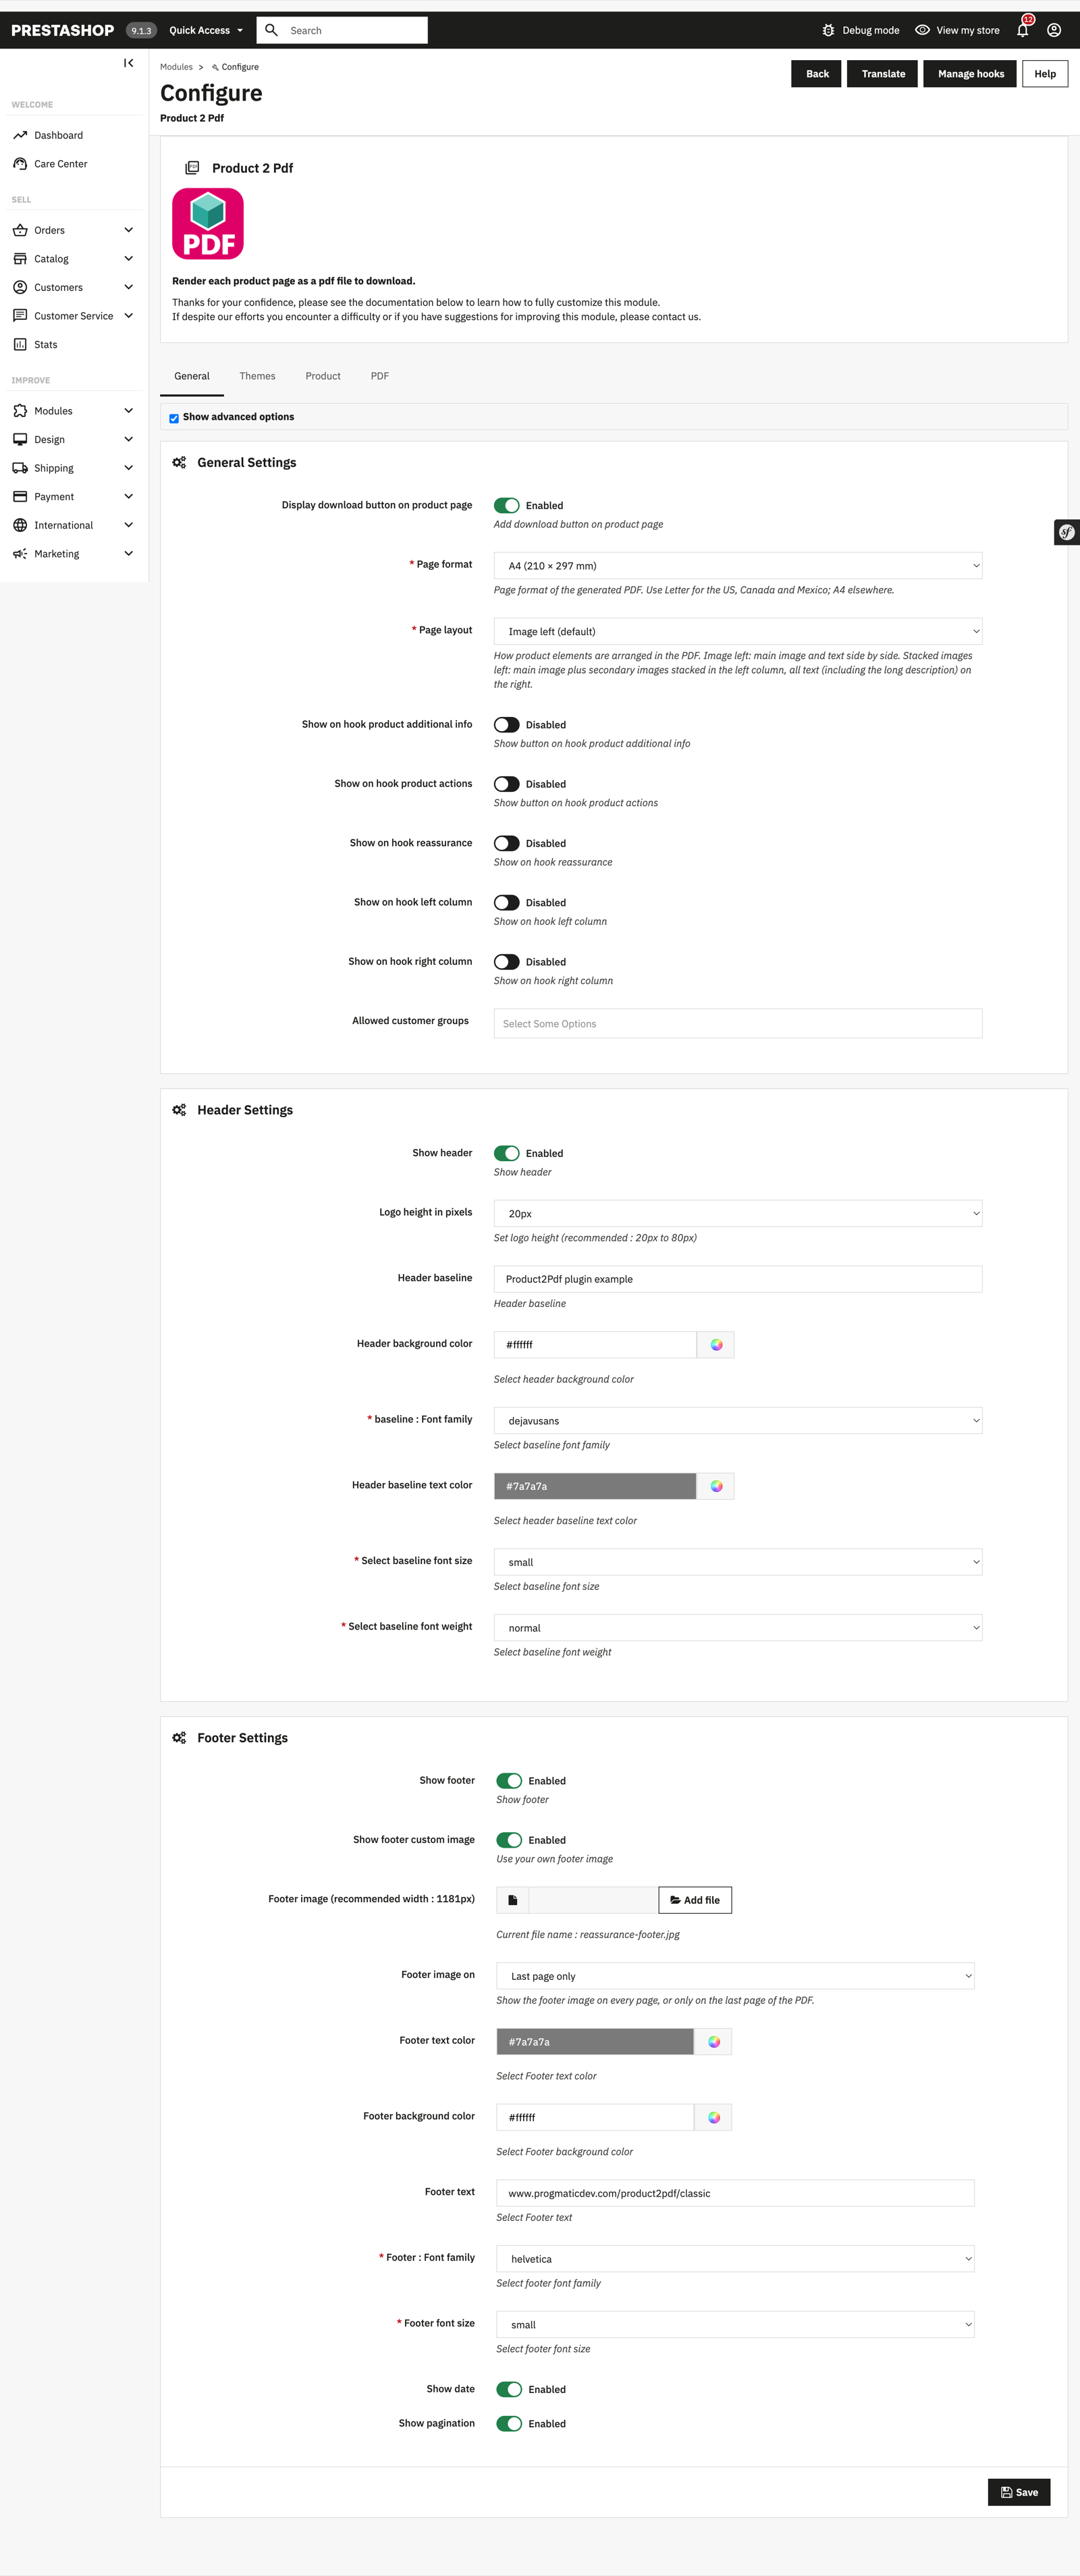
The General tab holds three sections: General Settings, Header Settings and Footer Settings.
General Settings
- Display download button on product page: master on/off switch.
- Page format: A4 (default) or Letter (US/Canada/Mexico).
- Page layout: how the product elements are arranged (see Page layouts).
- Hook switches: choose where the button appears (product additional info, product actions, reassurance block, left/right column). Enable the ones that fit your theme.
- Allowed customer groups: restrict who can generate PDFs by group.
Header Settings
Show/hide, logo height, a baseline text with its own font, size, weight and colour, and a header background colour.
Footer Settings
Show/hide, footer text, date and pagination switches, footer text font & size, and the footer custom image:
- Show footer custom image: upload your own image (e.g. a reassurance banner).
- Footer image on: All pages (default, drawn at the bottom of every page) or Last page only (drawn once, at the bottom of the last page).
Product tab
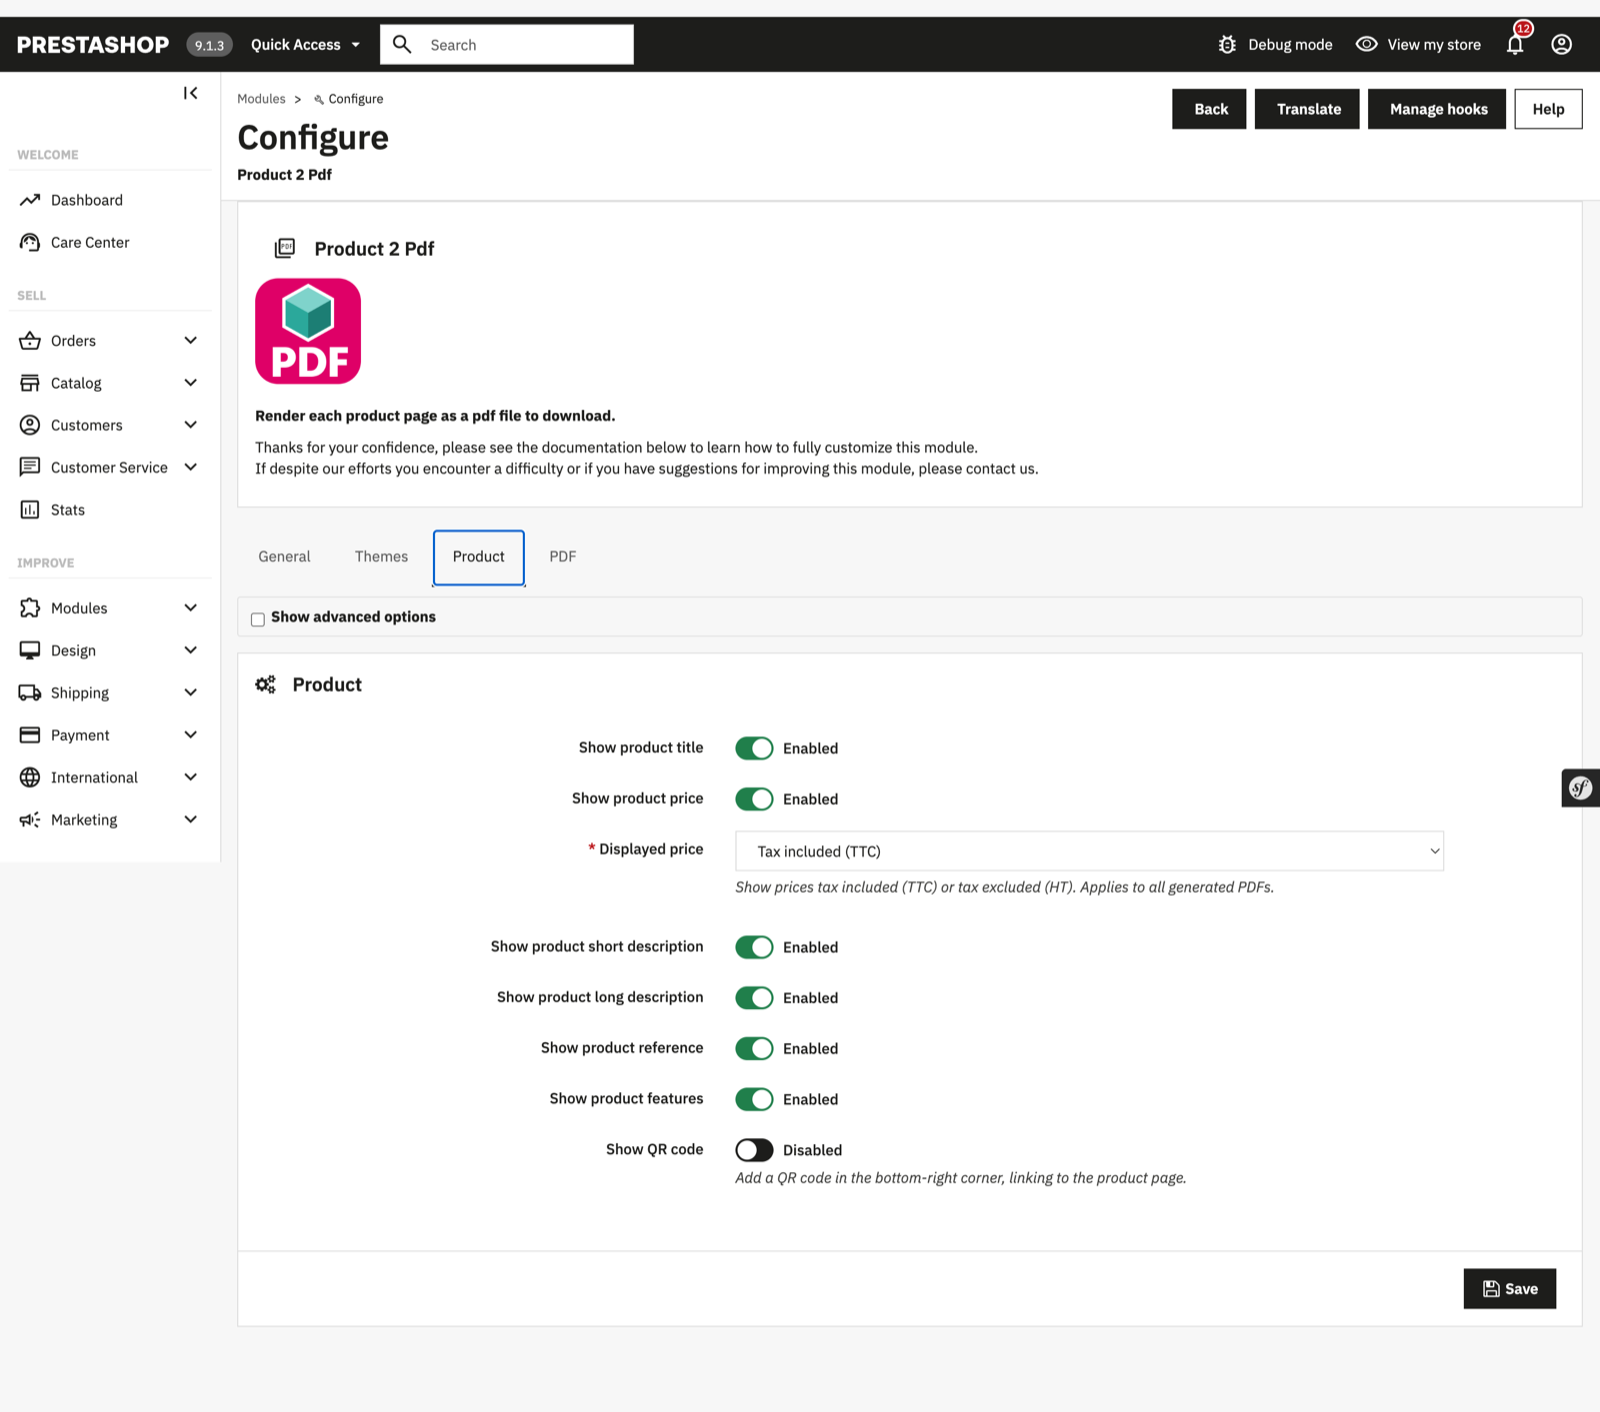
What product data is printed, and how.
- Price: show/hide, and Displayed price: Tax included (TTC) / Tax excluded (HT). In HT mode an “excl. tax” label is added (translated). For products with combinations, a “From” prefix is shown.
- Currency symbol position: Auto (default), Before or After the amount. Auto follows your shop currency’s own convention (e.g.
$12.50in the US,12,50 €in France); choose Before or After to override it. - Short / long description: show/hide, with optional max characters limits (see the note below). The long description also has a Preserve line breaks switch: keep its paragraph and line breaks, or render it as one continuous block.
- Reference, features, attributes: show/hide, with an optional Info table max rows limit.
- QR code: adds a QR code in the bottom-right corner linking to the product page.
- Per-element colours, fonts, sizes and weights, plus an optional background colour per element (title, price, descriptions, info table), all advanced.
0 = no limit). Text is cut on the nearest sentence
end (., !, ?) before the limit, or on the last whole
word with an ellipsis, never in the middle of a word. Use these to keep long products from
spilling over several pages.
Themes tab
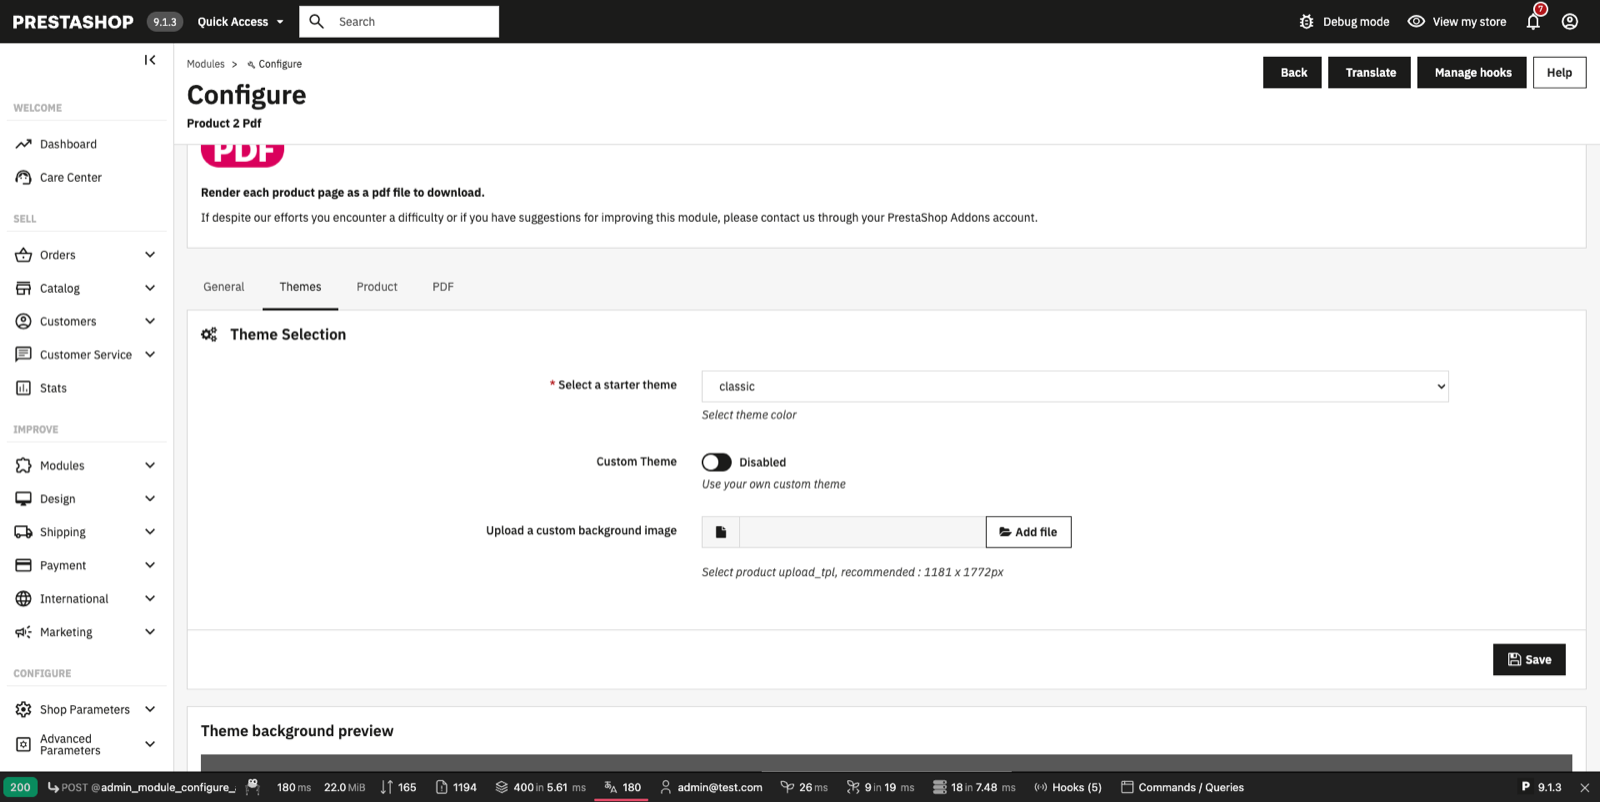
- Starter theme: pick a preset to set colours, fonts and the background image in one click. Presets included: classic, light, dark, nature, flowers, zen, motorsport, shopping and full background example. The latter shows how a full-page artwork can carry its own header and footer: it ships with the module header and footer turned off so only the product content is laid over the background.
- Custom background: upload your own full-page background image with an A4 aspect ratio. The back office recommends 1181 × 1772 px (the size of most bundled backgrounds); a higher resolution at the same ratio, such as 2480 × 3508 px, also works and prints sharper.
A preset is a starting point: after applying one you can still fine-tune every colour, font and switch on the other tabs. A preview of the theme background is shown right below the settings.
Page layouts
Three layouts are available from General → Page layout. They all share the same styling (colours, fonts, theme); only the arrangement changes.
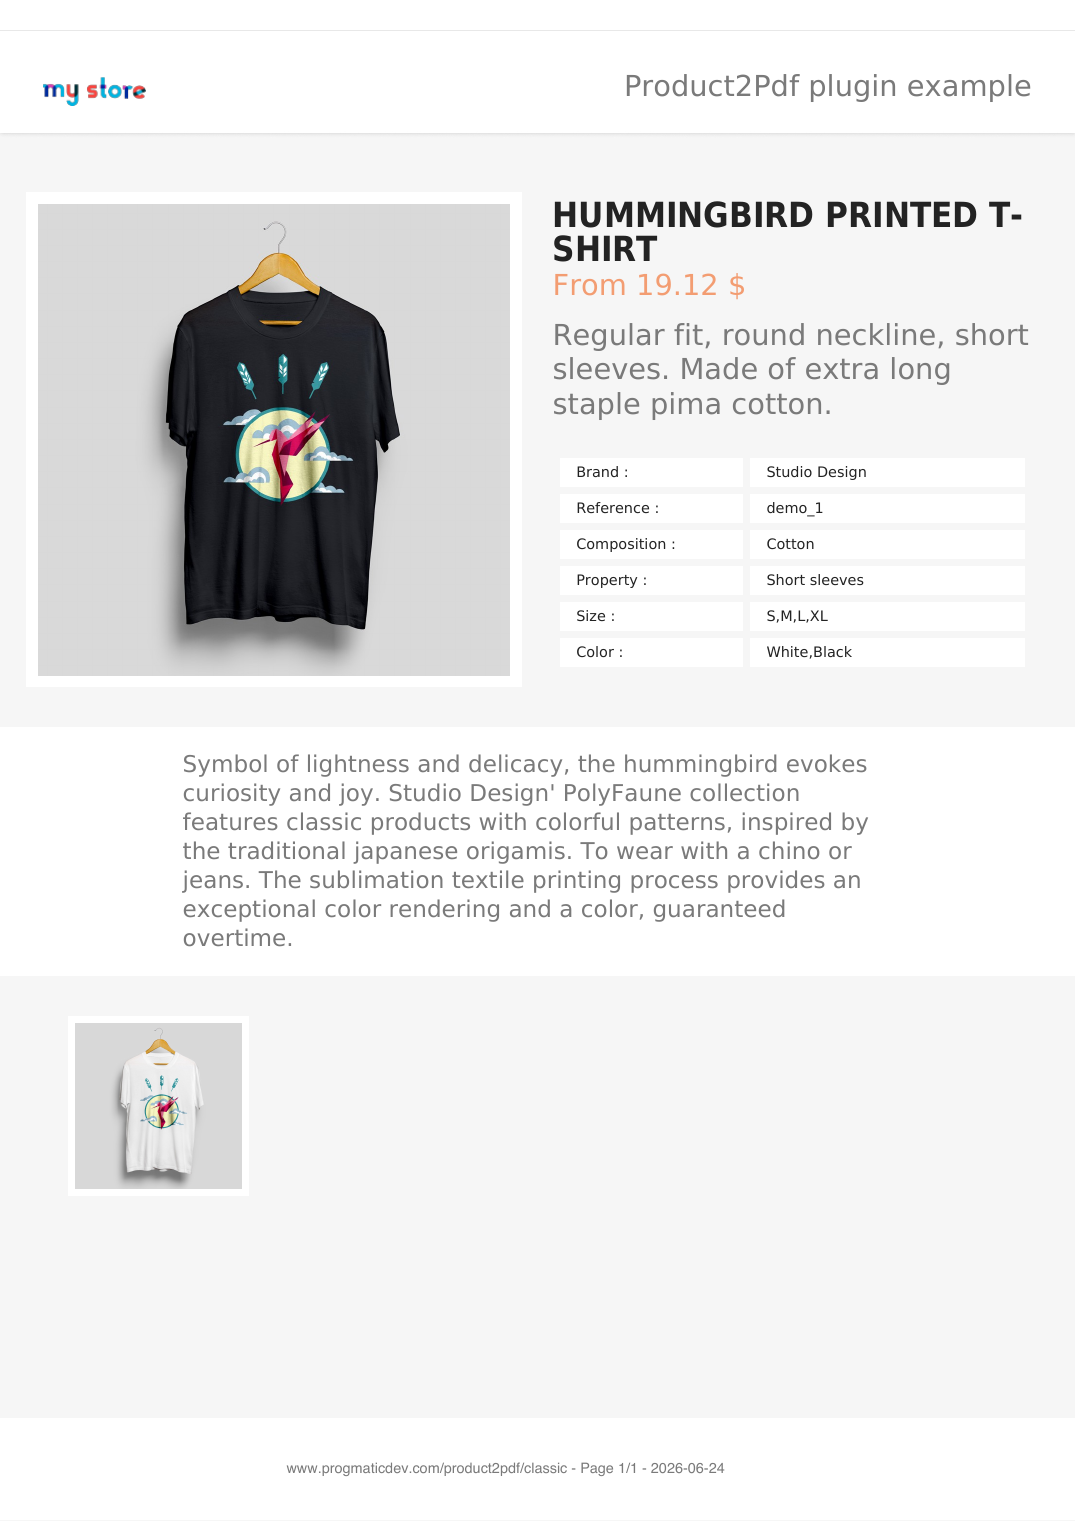
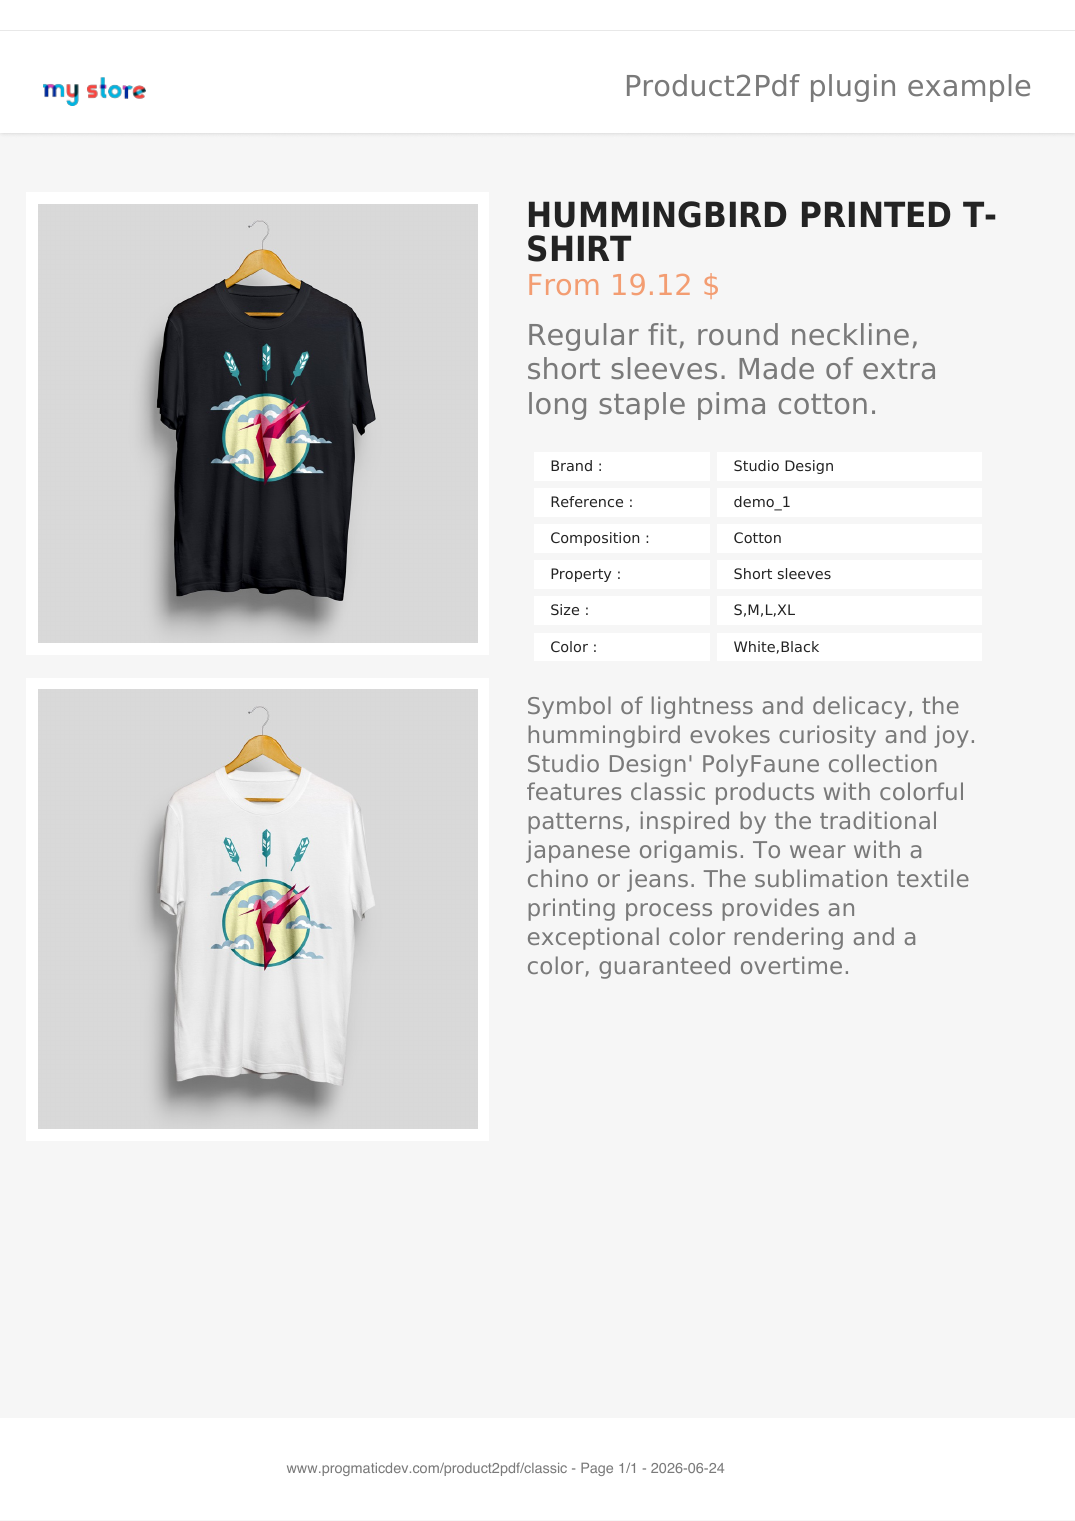
Image left (default)
Main image and product text side by side, long description below, secondary images at the bottom.
Stacked images left
Featured image plus the first secondary image stacked at the same size in the left column; all text (including the long description) on the right.
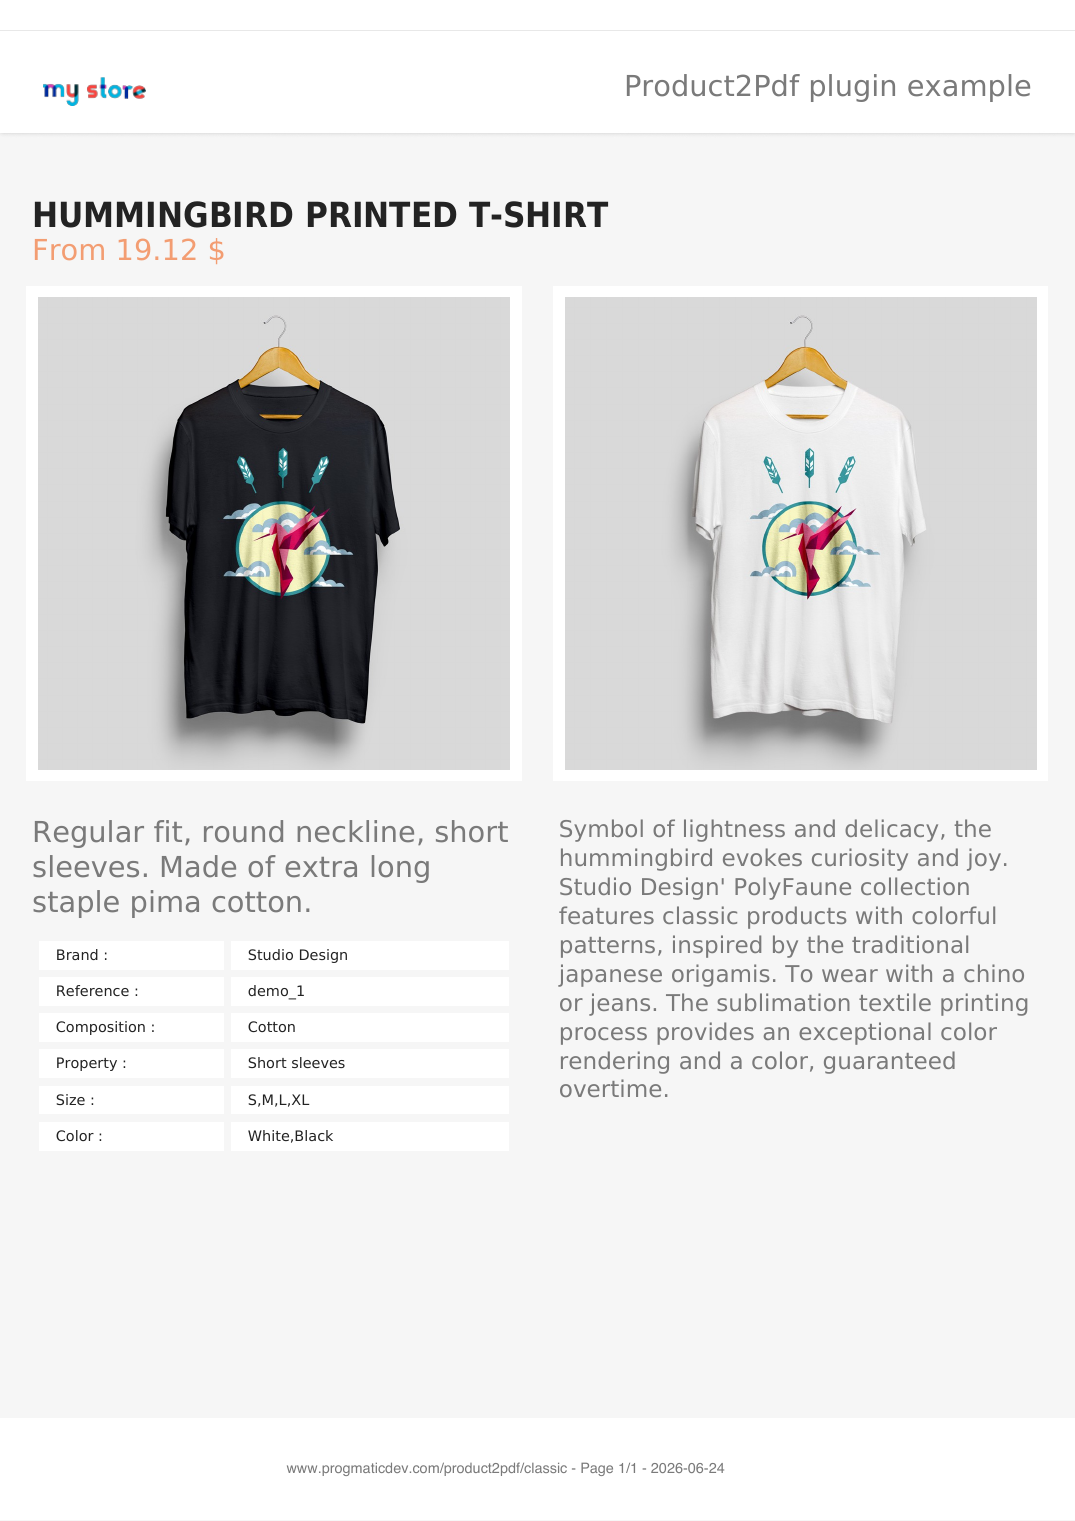
Full-width header
Title and price full width on top, the two images side by side beneath them, then a two-column block (short description + info table on the left, long description on the right). The bottom block adapts: if the long description is hidden it spans full width, and vice versa.
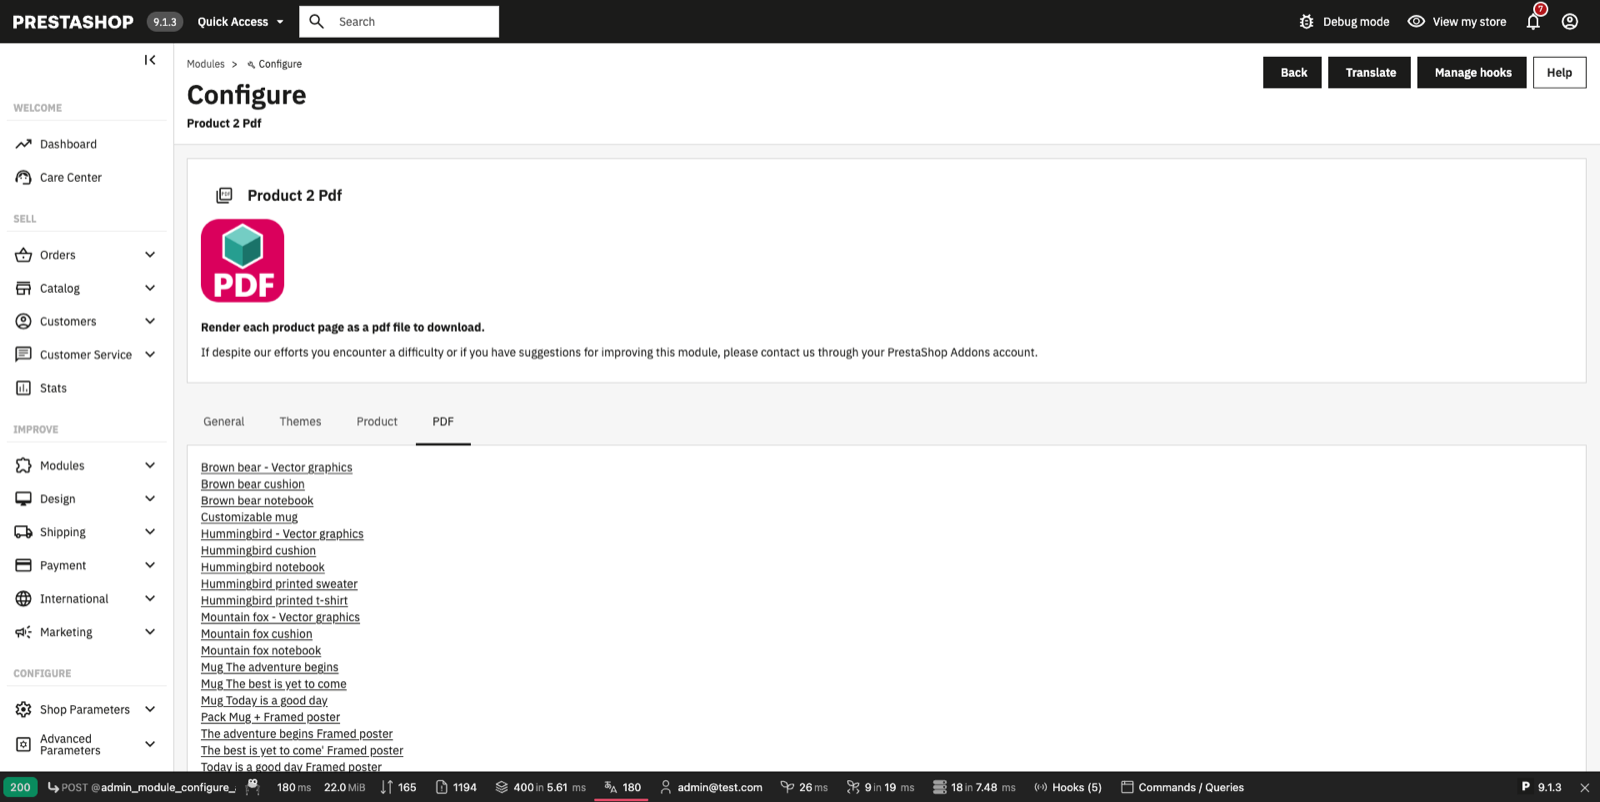
Built-in preview (PDF tab)
The PDF tab lists every product in the shop: click a product to generate its PDF with the current settings and preview it immediately, without leaving the back office or touching the front end. It’s the fastest way to test a theme, a layout or a length limit on your real products.
Front office
The download button is injected on the product page via one of the registered hooks. Each hook has its own switch on the General tab, so you can place the button where it fits your theme:
displayProductAdditionalInfodisplayProductActionsdisplayReassurancedisplayLeftColumn/displayRightColumndisplayProductExtraContent
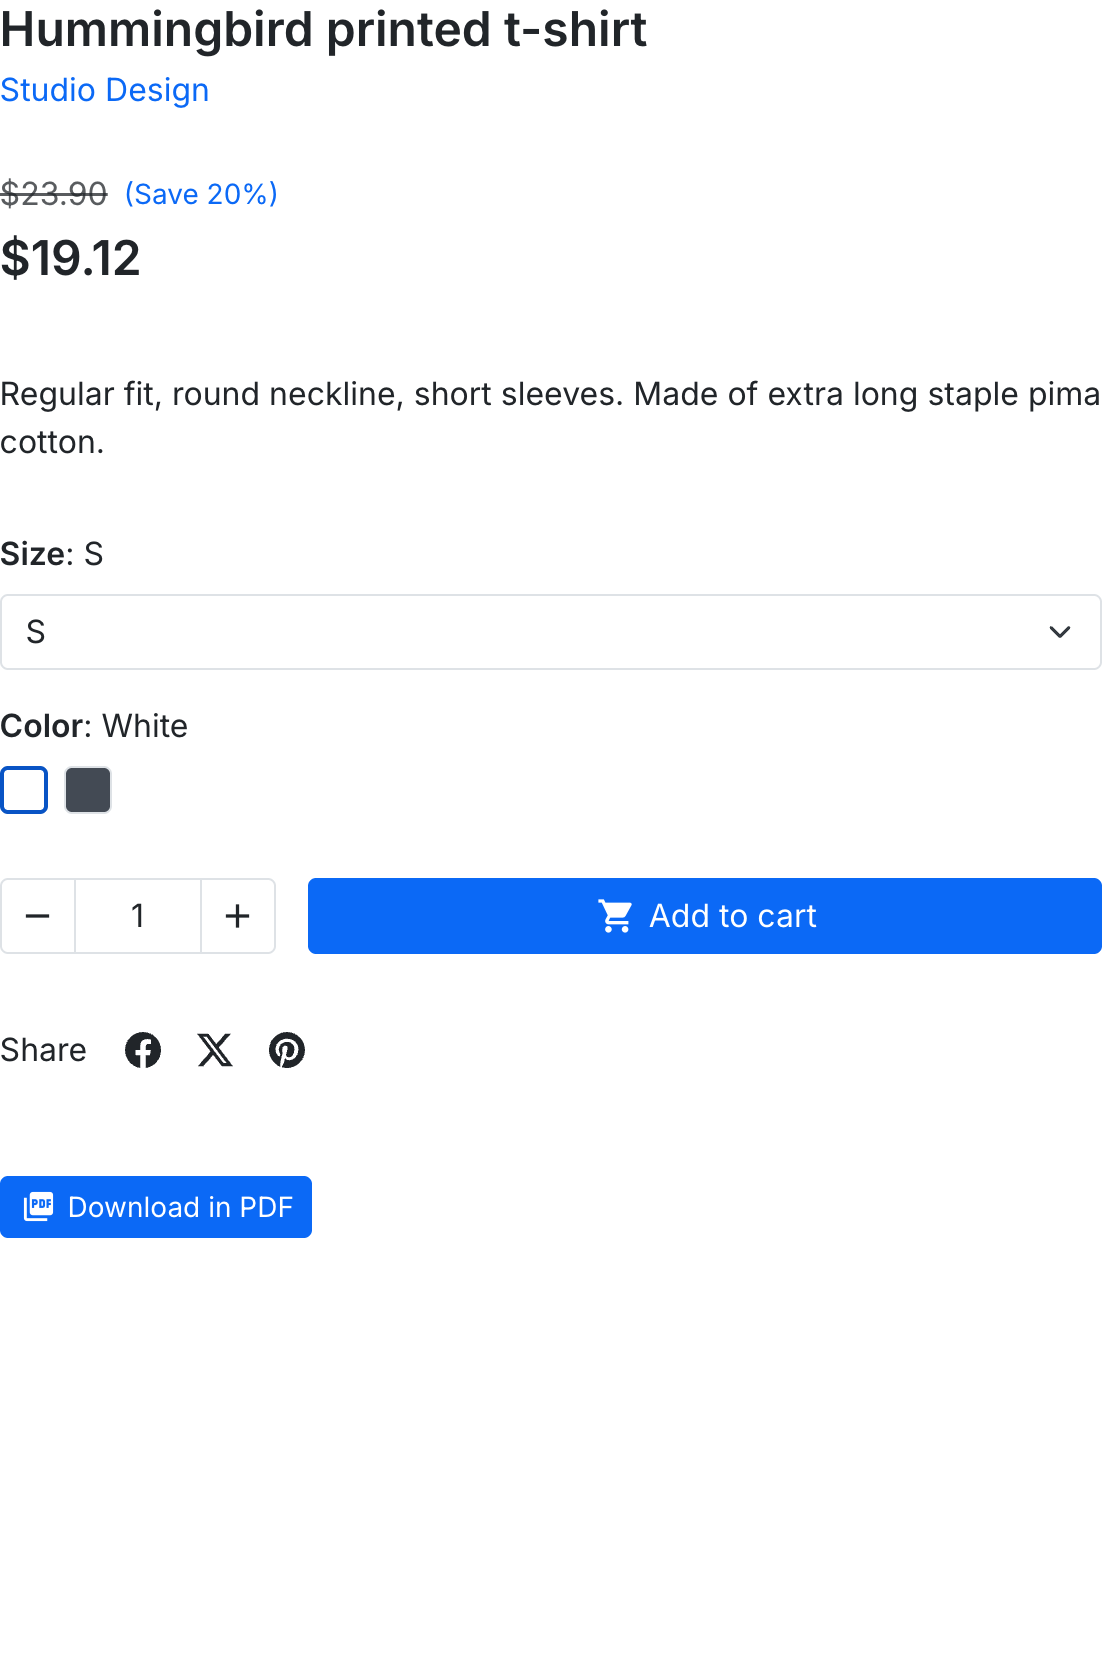
Clicking the button opens the generated PDF inline in the browser; the visitor can then save or print it.
Lead capture (email-gate)
Since version 1.1.0 the module can ask visitors for their email address before delivering the product sheet. Enable it in the Leads tab of the module configuration: the feature is optional and off by default.
- Logged-in customers keep the direct download.
- Guests fill a short form (email + mandatory consent checkbox) and receive the sheet as a download link by email, sent through the shop’s standard email settings. No attachment: heavy custom backgrounds never weigh the email down, and the PDF is generated with up-to-date product data at the moment the link is clicked.
- The link stays valid for the number of days you configure (0 = no expiry).
- Every request is stored as a lead: email, product, consent date, and whether the link was actually clicked (Downloaded column). A clicked link also proves the address is real.
- The Leads tab lists the captured leads and exports them all as a CSV file (semicolon separated, Excel-friendly).
- The email address is remembered in an encrypted cookie so the visitor does not retype it on the next product; consent is asked again every time.
- Compatible with the official GDPR module (psgdpr): data access and erasure requests cover the stored leads.
FAQ & troubleshooting
The button doesn’t show on my product page
Check that General → Display button on product page is on, that at least one hook switch is enabled, and that the hook is positioned in your theme (Design → Positions).
My PDF spans several pages
That’s expected for products with long descriptions or many images. Use the content length limits (Product tab) and the Info table max rows option to keep it compact, or the Footer image on: Last page only option if you only want the footer banner once.
The QR code or footer image overlaps the content
The module reserves space for them automatically. If you customised margins heavily, leave some bottom margin free.
Custom fonts
Roboto, EB Garamond and Great Vibes are bundled and selectable in the back office alongside the TCPDF native fonts.
Image upload fails
Make sure the web server can write to
modules/pmdproduct2pdf/views/img/templates/custom. The module creates the folder
automatically on install and before each upload.
Support
For questions or issues, contact ProgMaticDev at [email protected], or through your PrestaShop Addons account.